


Follow these steps to install SilkQuote and complete the initial Salesforce configuration. This guide covers package installation, Salesforce Sites setup, template configuration, permission assignment, Lightning page setup, and generating your first quote PDF.
If you cannot or do not wish to use Salesforce Sites, skip to Step 4: Assign SilkQuote Permissions to Users. Salesforce Sites are necessary only if you want customers to view, accept, or decline quotes through a hosted web page.
1. Install the SilkQuote Salesforce Package
- Open the installation link provided for SilkQuote.
- On the installation page select:
- Install for All Users
- Wait for the installation to complete.
- Click Done.
2. Configure Salesforce Sites for External Quote Access
This step allows customers and prospects to interact with quotes on your website (review, accept, decline, and communicate).
2.1 Navigate to Sites
- Go to Setup.
- Search for Sites.
- Open the Sites configuration page.
2.2 Create a New Site
- Click New Site.
- Enter a Site Name.
- Example:
Silk Quote
- Example:
- Use the default URLs provided if working in a developer org.
- Copy the generated Site URL.
- In Active Site Home Page:
- Enter
Quote - Select Quote Review Page
- Enter
- Click Save.
2.3 Activate the Site
- Return to the Sites page.
- Locate the site you created.
- Click Activate.
Site Limits
- Developer Org: 1 site allowed
- Enterprise Edition and above: Up to 25 sites
2.4 Assign the Managed Package to the Site Guest User
- Go to the SilkQuote Site Guest User record.
- Scroll down to Managed Packages.
- Add SilkQuote as an assigned managed package.
3. Connect the SilkQuote App to Your Salesforce Site
3.1 Open the SilkQuote App
- Open the App Launcher.
- Search for SilkQuote.
- Select the SilkQuote app.
- Close any default onboarding prompts if they appear.
3.2 Configure the Default Template
- Locate the Default Template included with the package.
- Click Edit.
- Find the field Quote Review Site URL.
- Paste the Site URL copied earlier.
- Click Save.
4. Assign SilkQuote Permissions to Users
Click Assign Permissions within the SilkQuote configuration.
Three permission groups must be configured.
4.1 Admin Permissions
Admins can:
- Configure templates
- Change system settings
- Generate and send quotes
Steps
- Click Assign Permissions → Admin.
- Select users with the System Administrator role.
- Assign permissions.
4.2 SilkQuote User Permissions
These users are typically sales representatives.
They can:
- Generate quotes
- Send quotes
They cannot:
- Modify templates
- Change application settings
Steps
- Click Assign Permissions → SilkQuote User.
- Select the appropriate sales users.
4.3 SilkQuote Site User Permissions
This permission allows guest users accessing quotes through the website to interact with quotes.
Steps
- Click Assign Permissions → SilkQuote Site User.
- Select the Site Guest User created for the site.
- Assign the permission.
This enables prospects to:
- View quotes
- Accept or decline quotes
- Interact with the quote experience
5. Add the SilkQuote Live Panel to the Opportunity Lightning Page
5.1 Open an Opportunity
- Navigate to an Opportunity record.
5.2 Edit the Lightning Page
- Click Edit Page to open the Lightning App Builder.
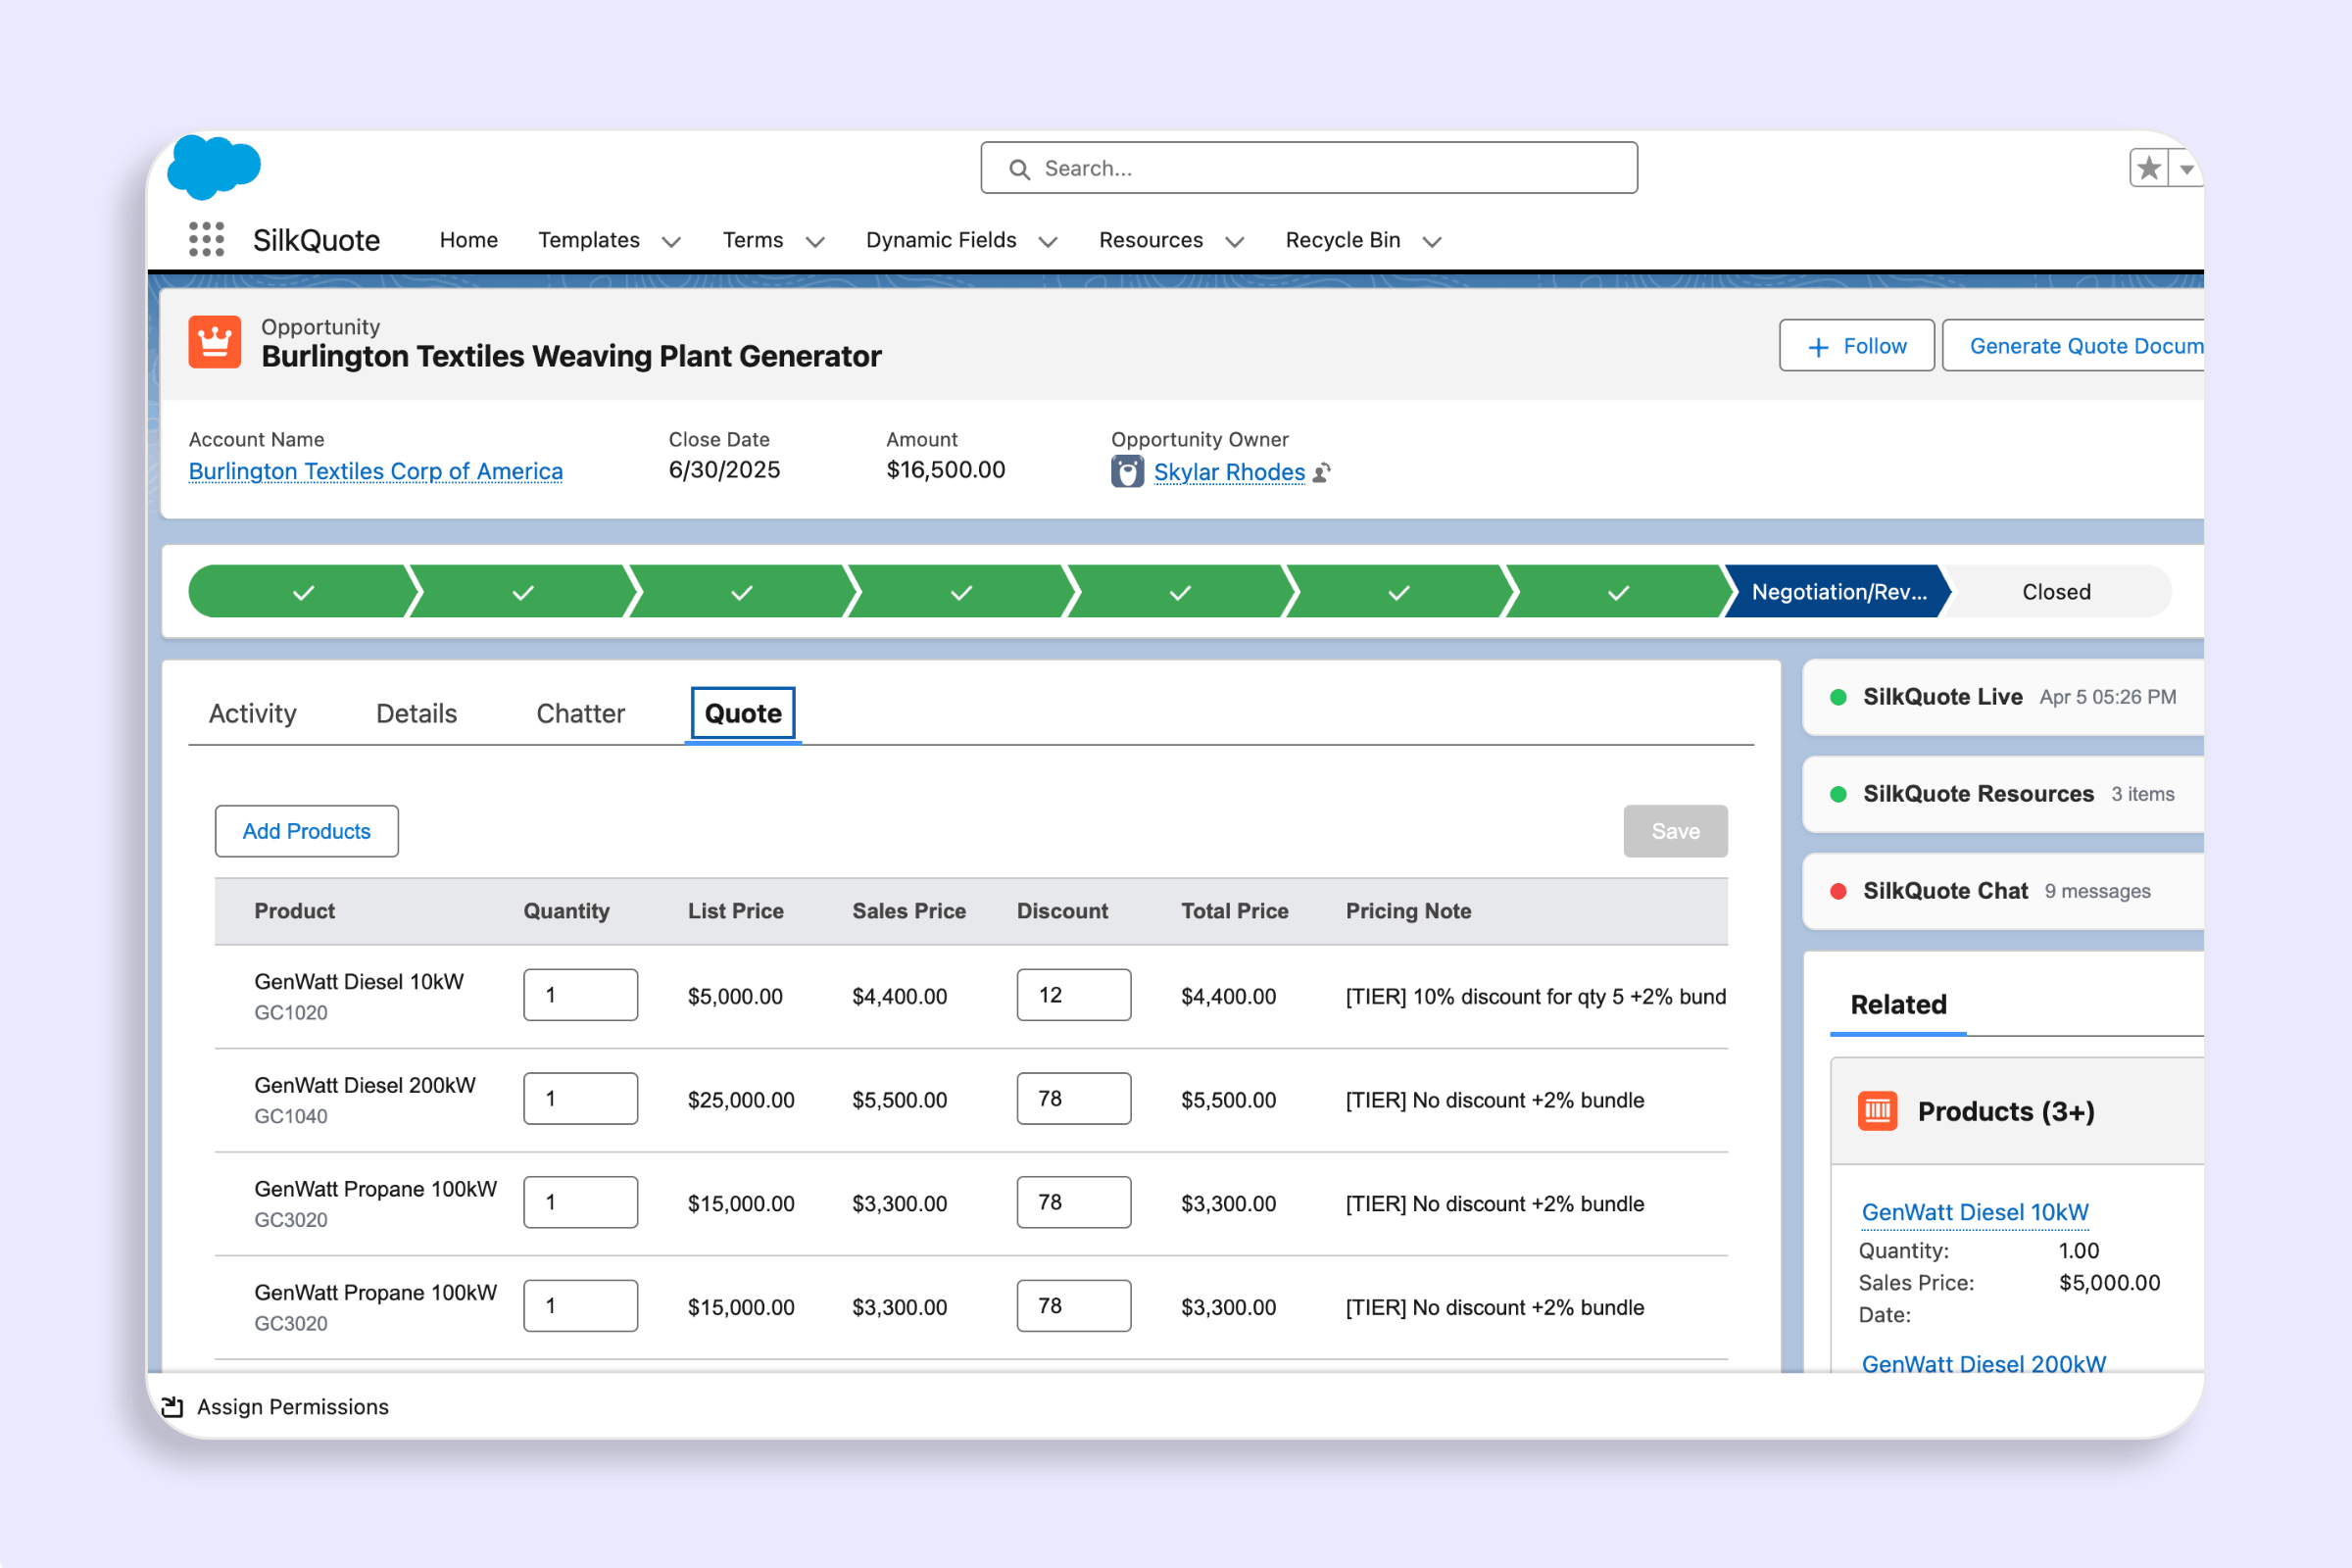
5.3 Add the SilkQuote Live Panel
- Locate the SilkQuote Live Panel component.
- Drag it to the one-third sidebar section of the page.
Recommended placement:
- Right sidebar (one-third layout)
You may place it elsewhere if preferred.
6. Add Quote Actions to the Opportunity Page Header
6.1 Enable Dynamic Actions
- In the header section, locate Actions.
- Change the action type to Dynamic Actions.
This allows conditional display of actions.
6.2 Add Quote Actions
Add the following actions:
- Generate Quote Document
- Email Quote Document
- External Comment
SilkQuote Setup Complete: You’re Ready to Go
At this point SilkQuote is fully operational on Salesforce:
- Package installed
- Salesforce Site configured
- Quote template connected to the site
- Permissions assigned
- Opportunity page configured
- Live panel integrated
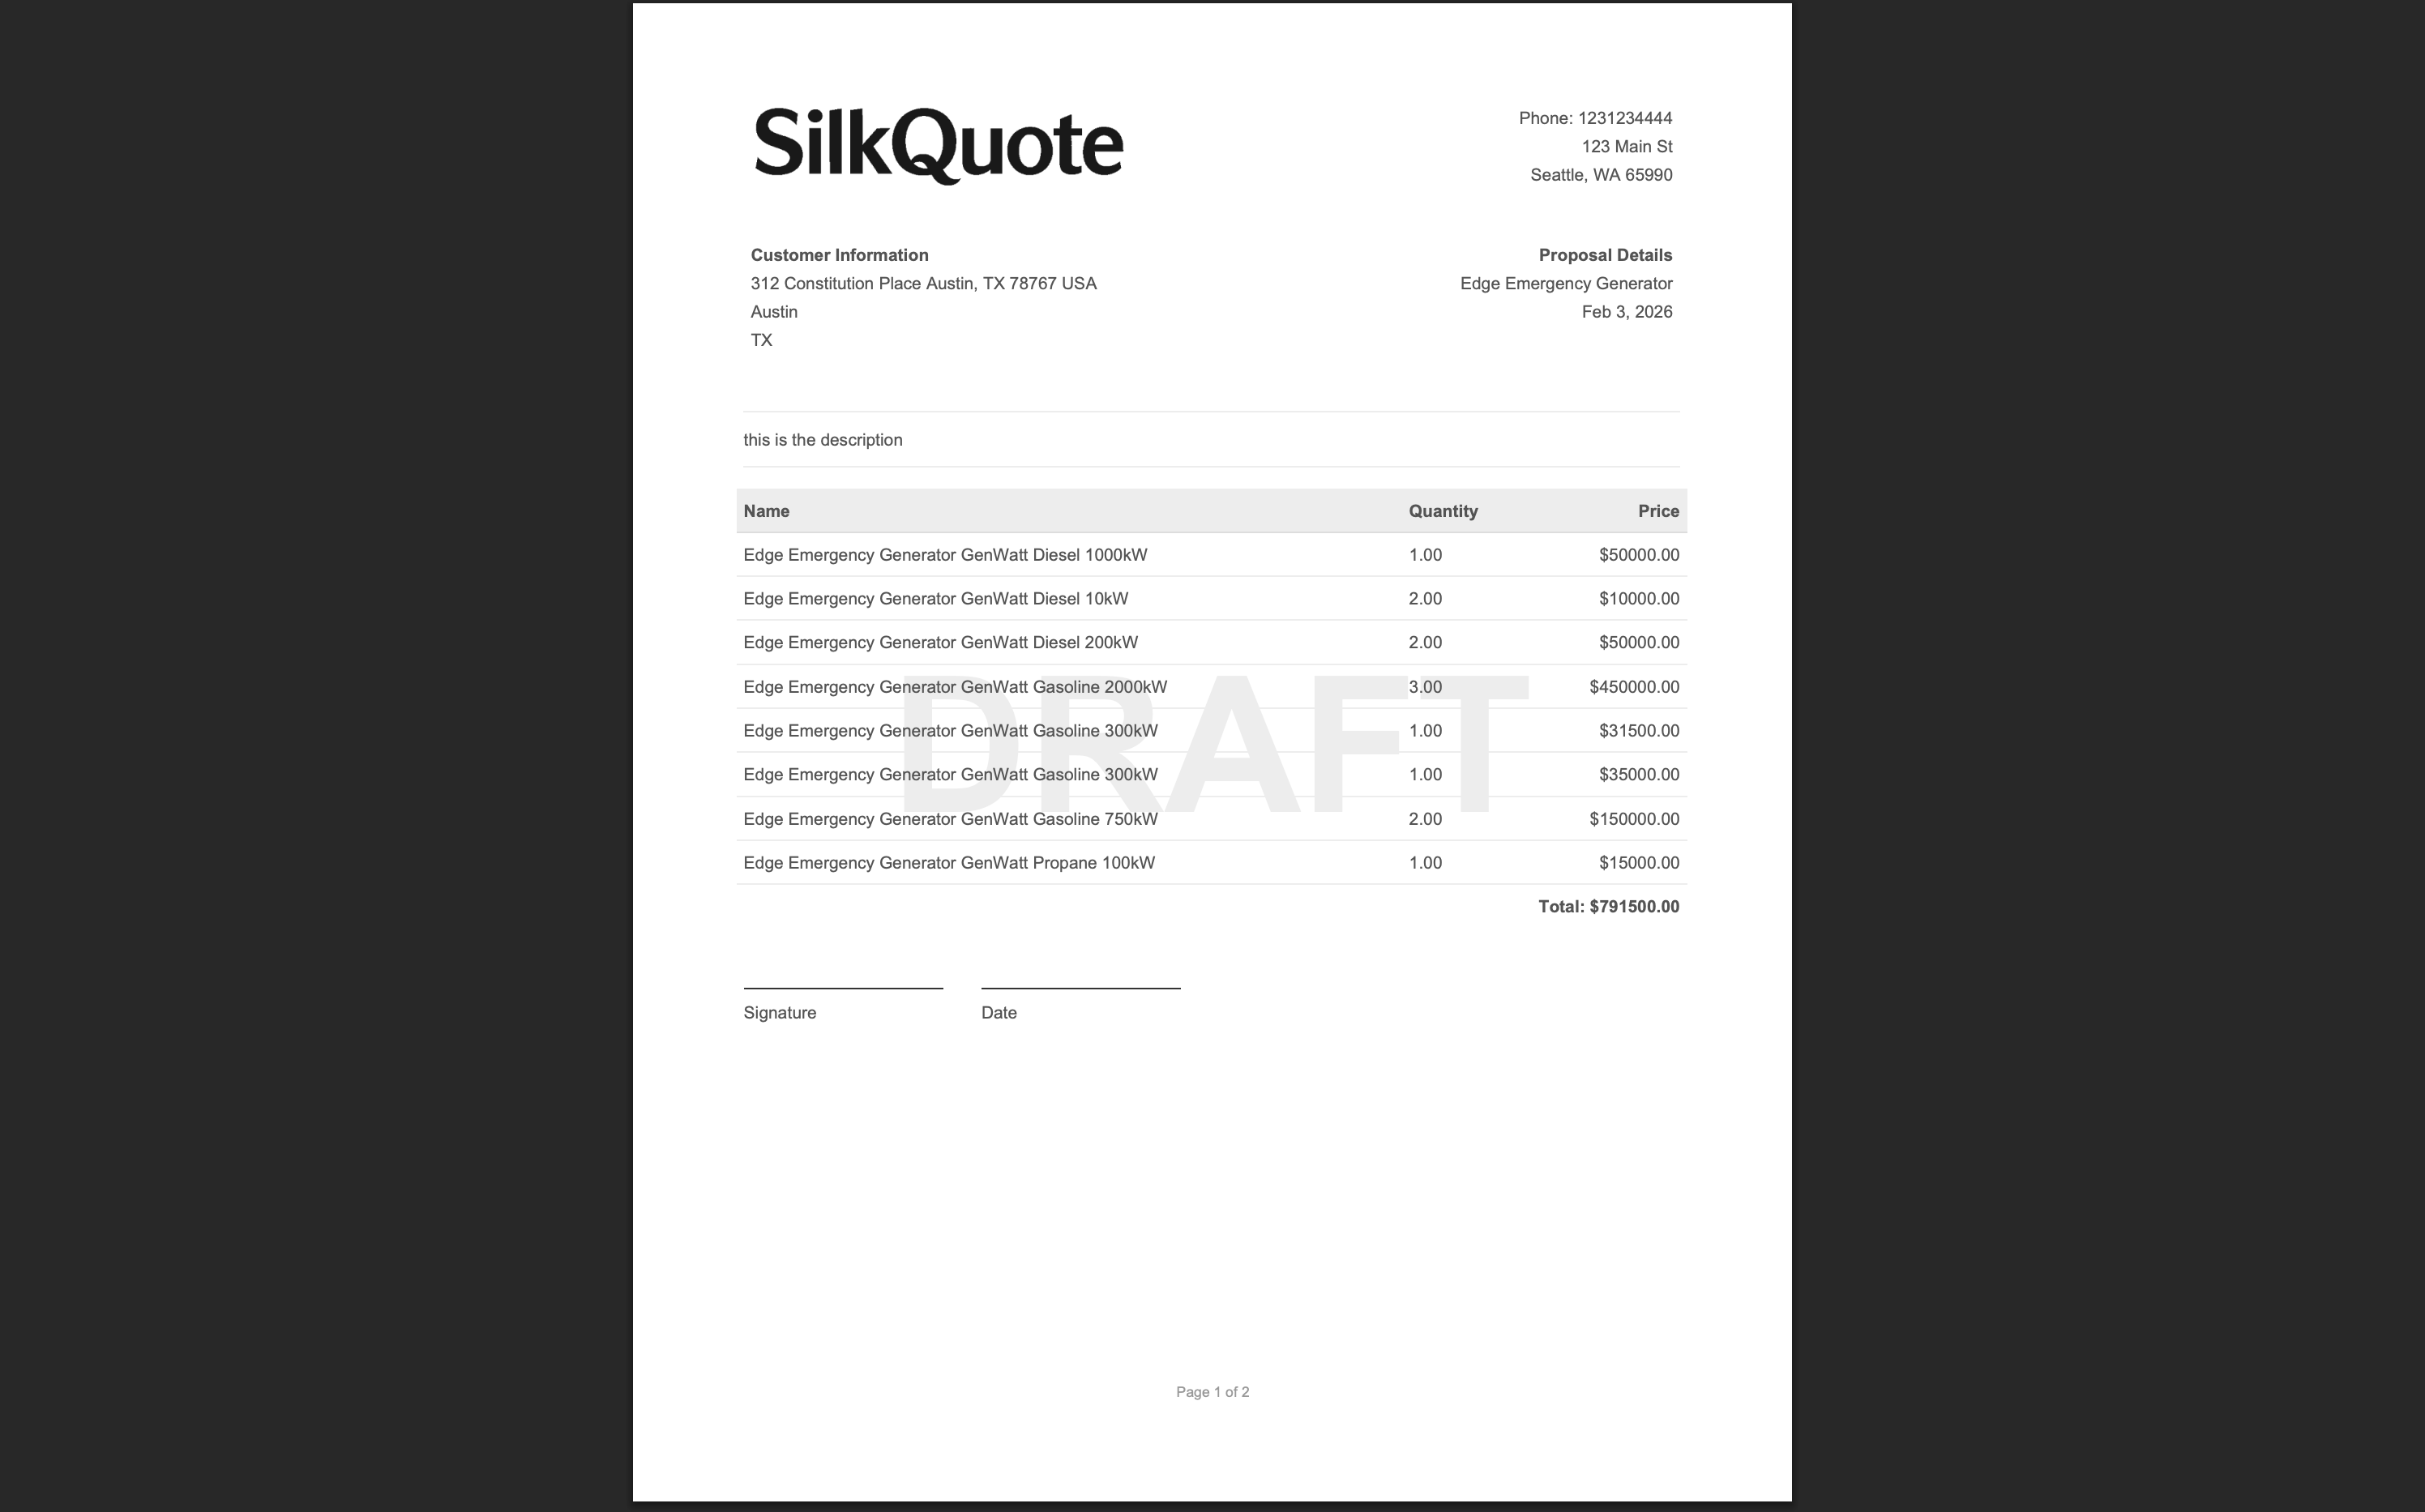
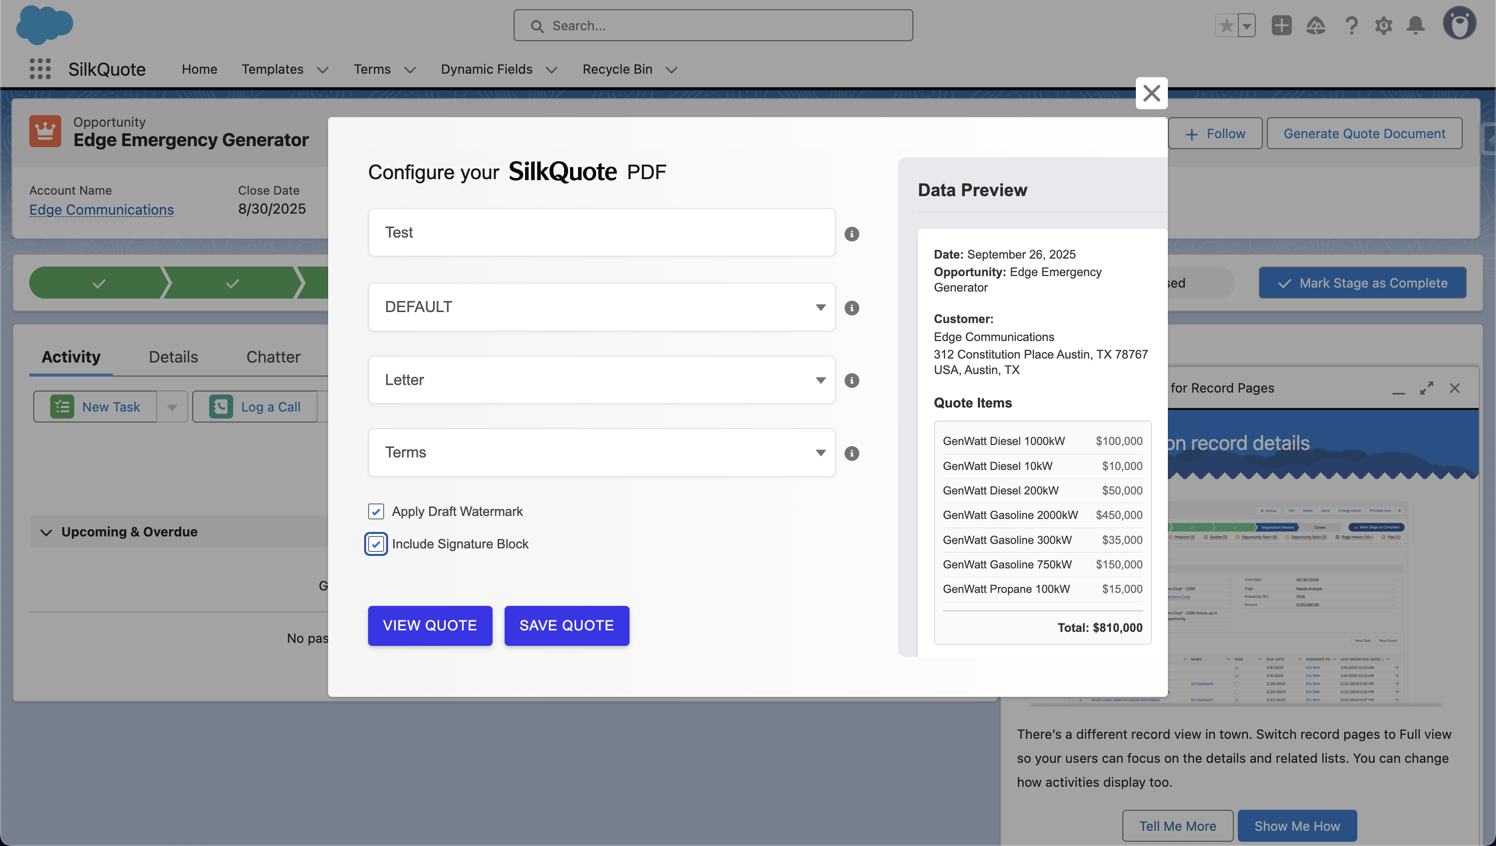
- Quote generation tested
- Email sending ready
Sales reps can now generate, review, and send interactive quotes directly from Opportunity records.